Genesis Blocks: Using the Advanced Columns block as a container
Introduction
The Genesis Blocks plugin is a powerful tool for enhancing the design and layout of your WordPress website. The free plugin simplifies the process of creating visually appealing content by providing a set of custom blocks, all of which extend your ability to make more customized page layouts.
In this post, I will focus on one specific block within Genesis Blocks, called the “Advanced Columns” block, and how it can be used as a versatile container for organizing your content effectively.
Understanding the Genesis Blocks Plugin
When installed and activated, the Genesis Blocks plugin adds several custom blocks to your site’s Block Editor. These blocks are slightly different than what comes out of the box with WordPress, and I prefer to build pages with these blocks because they use different customization settings and options which are easier to use in my own workflow.
The importance of user-friendly design elements in web content cannot be underestimated. To keep your users engaged, you need to ensure they aren’t overwhelmed with giant walls of text, too many button options, or a number of other scenarios. The Genesis Blocks plugin can help you achieve this by providing a focused list of custom blocks that look great and aren’t crowded with too many options.
What is the “Advanced Columns” Block?
The Advanced Columns block is a core feature of the Genesis Blocks plugin, and it was designed to simplify the creation of complex layouts. The block’s primary purpose is to serve as a flexible container for organizing content into columns. While there is a default ‘Columns’ block that comes bundled with WordPress, I find that its many configuration settings can be a bit much to keep track of, especially when a new user is just learning how to use the Block Editor for their first time.
The Advanced Columns block is perfect to use for various types of content, such as text, images, videos, and more. Its limited options and settings are just enough to allow for lots of variation on pages, while not being too overbearing for the user.
Creating a New Post/Page
First, if you have not already installed and activated the Genesis Blocks plugin, now is the time to do so.
Let’s start by making a new Page.
Login to your WordPress admin area, then go to: Pages > New.
Ensure you are not using a plugin like “Classic Editor,” which will disable the Block Editor. You will need the Block Editor to be working in order to use the Genesis Blocks plugin.
Adding the “Advanced Columns” Block
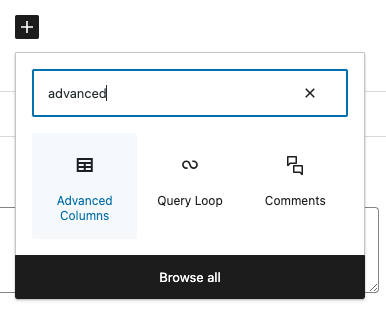
You can add the Advanced Columns block to your new page by clicking the ‘+‘ button, or by typing the slash character ‘/‘ — then start typing the word “advanced” to filter through the selection of available blocks. When you see the Advanced Columns block, click it to add it to your page.
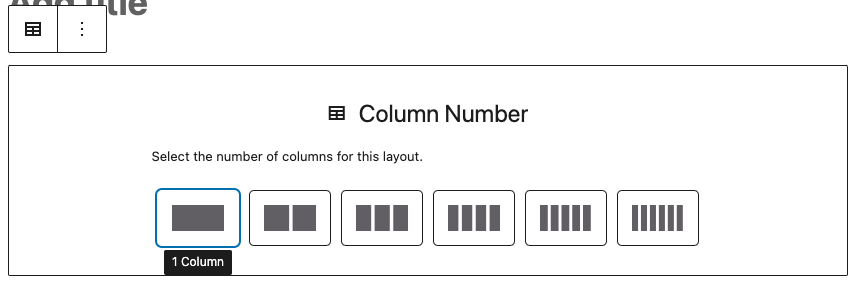
When added to the page, the block will first ask how many columns you’d like the container to have. After choosing a preset column amount, the block will automatically add a main ‘Advanced Columns’ container block, as well as the chosen amount of ‘Column’ blocks inside of the container. The text cursor will be located inside the first inner Column block. You can start typing immediately to insert content inside the block.
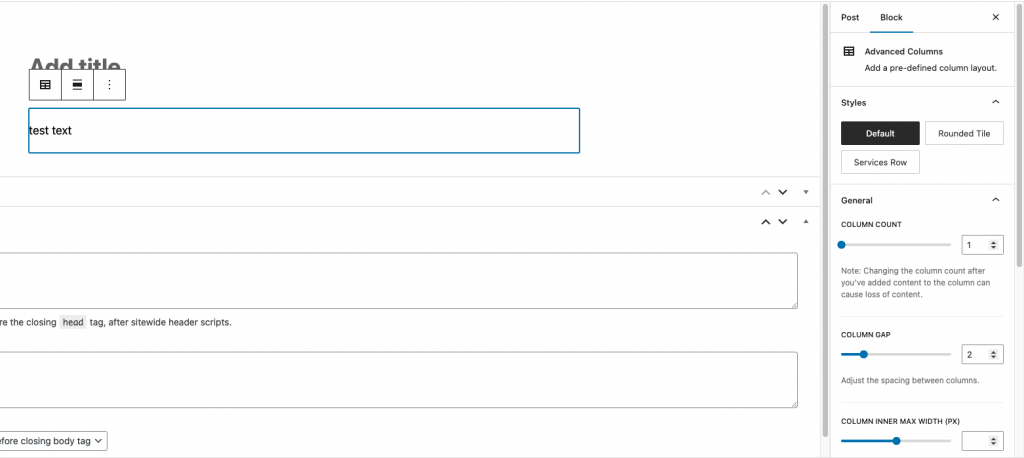
Clicking on a block will show its settings on the right side of the Block Editor. When clicking on the Advanced Columns block, I’ve found the Block Editor will select the inner Column block, and not the outermost container block.

To mitigate this, I make sure to use the Document Overview tab so I can see and select the exact block I am trying to change.
Using the “Advanced Columns” Block as a Container
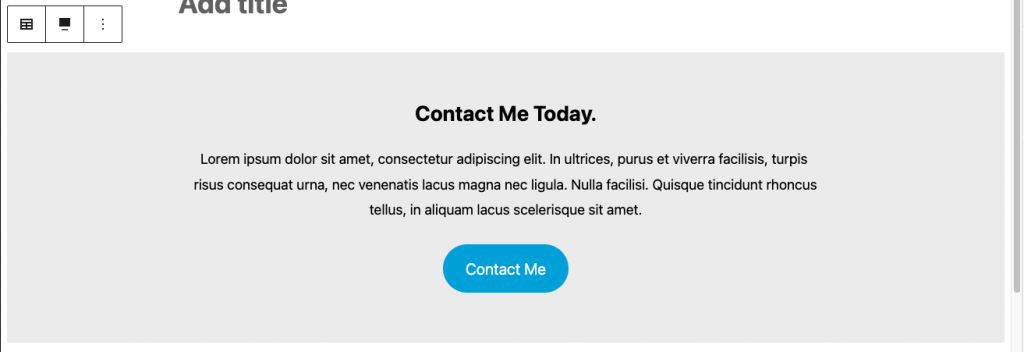
The Advanced Columns block works great as a container for page content, because of its simplified settings for changing the amount of Columns and the spacing inside of each column.
There are many situations you may come across where this block is particularly useful, such as full-width sections to visually separate content, a multi-column layout for a pricing table, a feature comparison, or anything else your site may need.
The Advanced Columns block simplifies the design process, even for users without extensive coding knowledge. Upon first use, a user can start testing out all the block settings, and after a short time they will have a powerful and flexible content container that is easy to use and configure.
Customizing the “Advanced Columns” Block
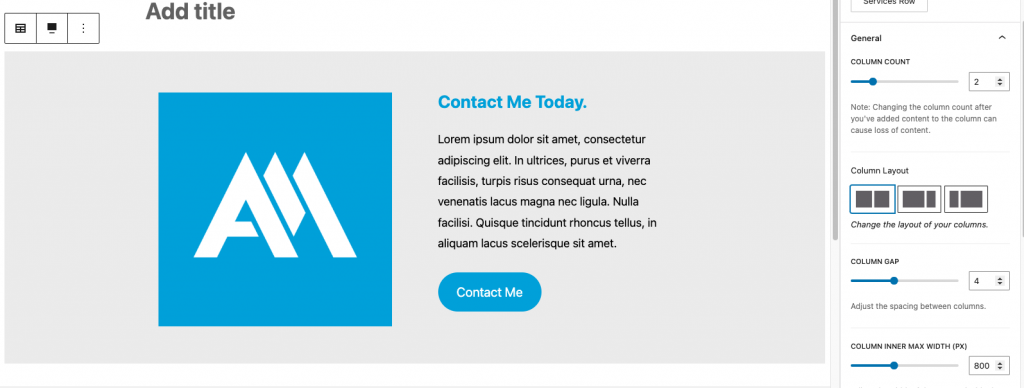
The Advanced Columns container block includes settings for the number of columns, as well as the layout for each column. The block also includes options to customize the colors, margins, paddings, responsiveness, and more.
The Columns inner block includes settings for that individual column in the container. These settings also include margins and padding, colors, and more.
When creating pages, I like to use the Advanced Columns block as containers for each section of content. This makes it easy to visually differentiate between the content sections by using different background colors, container padding, and column layouts.
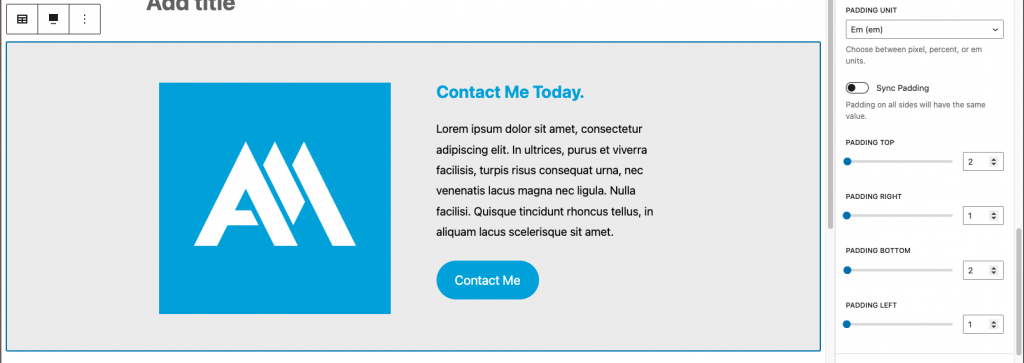
Make sure you experiment with the block settings, to get a good understanding of how they work and to achieve the desired aesthetic for your website. I like to use the em measurement units for padding and margins, as it seems to look great and scales appropriately to all screen sizes.
Adding Content Inside the Columns
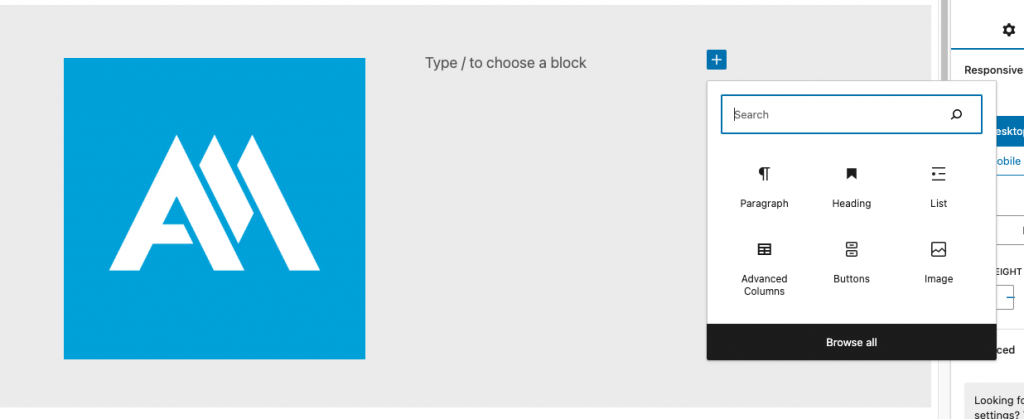
Once you’ve added an Advanced Column block container, you need to add content inside of it. You can add text, images, videos, or other blocks, inside the columns you’ve created.
The Block Editor allows content to be rearranged, so if you need to reorganize your content it is as easy as selecting a block and using the drag-and-drop functionality, or clicking the up and down caret icon to reposition the currently selected block.
One of my favorite parts of the Advanced Colums block is its versatility in accommodating different content types and arrangements. Experiment and see what you like!
Best Practices and Tips
To effectively utilize this block, you’ll want to keep in mind a few things:
- How will the page look on narrow screens (tablets and phones)? Make sure you resize your browser window while editing, to keep track of how the content and blocks will “stack” on top of each other at different screen sizes.
- I like to set a max-width on sections that contain only paragraph text. This confines the text to a manageable column width, making it easier to read for site visitors on larger screens.
- You can setup the padding and margins on one container, and use copy/paste to place the same block on any other post/page. This will help maintain visual consistency and save you time entering padding values.
- Make sure to avoid overcrowding columns with too much content. Users do not want to read tall walls of text, so break up your content into more manageable “chunks” that the user can absorb more easily.
Conclusion
Now you should be ready to start using the Advanced Columns block as a container for your content. You can quickly find and select the block from the library, configure its settings, and you’re good to start adding content in a flexible container.
Don’t be afraid to put your newfound knowledge into practice — experiment with the Advanced Columns block to improve your website’s visual appeal.
Additional Resources
Official Genesis Blocks documentation:
Advanced Columns block
YouTube: Genesis Blocks Basics:
https://www.youtube.com/watch?v=4kEBbur8ct0
Conclusion
Thank you for reading this post and visiting my blog! If you have any questions or comments about the Advanced Columns block, feel free to post those in the section below and I’ll reply as soon as I can.
If you’d like to learn more about Genesis Blocks or WordPress development, make sure you check out my other blog posts on this site.
Leave a Reply